How to Select the Right Size Diamond Earrings
Carat, MM and Pair Weight Guide for Studs, Halos, Clusters and Shapes • Published September 10, 2026
.jpg "How to Select the Right Size Diamond Earrings")
The strongest way to choose size: earring type → pair-total weight → per-ear weight → diamond dimensions → finished setting dimensions → wearer preference.
Choosing the right diamond earring size requires separating three measurements that are often confused: carat weight, diamond dimensions and finished earring size. Carat tells you how much a diamond weighs. Millimetres tell you how large the diamond actually measures face-up. Finished earring dimensions tell you how large the complete stud, bezel, halo, cluster or other setting appears once metal and additional diamonds are included.
Those numbers are related, but they are not interchangeable. For simple round solitaire studs, carat weight and approximate diameter can be compared reasonably well using a reference table. Once you move to oval, pear, princess, halo, bezel or cluster designs, the relationship changes and the complete finished dimensions become increasingly important. The strongest way to choose size is therefore: earring type → pair-total weight → per-ear weight → diamond dimensions → finished setting dimensions → wearer preference.
Quick Answer: What Diamond Earring Size Should You Choose?
Start by deciding how much physical presence you want on each ear. Then check whether the product's carat weight is stated per pair or per earring. For a simple two-stone solitaire pair, a 1.00 ct total pair generally means roughly 0.50 ct in each ear, assuming the stones are evenly matched. A round 0.50 ct diamond is approximately 5.1 mm across according to Blue Nile's current round-diamond size reference.
That means a simple 1.00 ct total-weight round solitaire pair would use diamonds around 5.1 mm each, before accounting for the setting. A 2.00 ct total pair would use roughly 1.00 ct per ear, and a typical well-proportioned round 1.00 ct diamond is approximately 6.4 mm across. Those millimetre values describe the diamond, not the complete earring. A bezel, halo or cluster can make the finished stud substantially larger.
Round Diamond Stud Size Reference
The table below is for simple two-stone round brilliant stud pairs where total carat weight is divided approximately equally between the two earrings. The diameter values are approximate references rather than guarantees because carat measures weight, and actual diameter varies with diamond proportions and cut.
| Pair Total Carat Weight | Approx. Diamond Weight Per Ear | Approx. Round Diamond Diameter Per Ear |
|---|---|---|
| 0.50 ct TW | 0.25 ct each | ~4.1 mm |
| 1.00 ct TW | 0.50 ct each | ~5.1 mm |
| 1.50 ct TW | 0.75 ct each | ~5.8 mm |
| 2.00 ct TW | 1.00 ct each | ~6.4 mm |
| 3.00 ct TW | 1.50 ct each | ~7.4 mm |
| 4.00 ct TW | 2.00 ct each | ~8.1 mm |
Use this table as a round solitaire reference only. Do not use it to predict finished halo diameter, bezel diameter, cluster width or the dimensions of fancy-shaped diamonds.
Why Pair-Total Carat Weight Causes Confusion
Diamond earrings are usually purchased as a pair. That means the headline carat figure may describe the combined diamond weight of both earrings rather than the diamond in one ear. A buyer who reads "1 carat diamond earrings" and assumes there is a one-carat diamond in each ear could end up expecting studs almost a full size category larger. This is why Aurelia product pages should never leave pair-total weight ambiguous.
| Product Wording | What It Should Mean |
|---|---|
| 1.00 ct TW pair | 1.00 ct across both earrings |
| 0.50 ct each | Approximately 1.00 ct across the pair |
| 1.00 ct each | Approximately 2.00 ct across the pair |
| 2.00 ct TW | Combined total across both earrings |
| 2.00 ct TW halo pair | Centre + halo diamonds across both earrings unless stated otherwise |
The phrase TW or TCW should always have a clearly defined scope.
Carat Weight Is Not Diamond Diameter
This is the most important concept on the page. A carat is a unit of weight. It does not directly measure width. GIA defines one metric carat as 200 milligrams. Two diamonds can therefore weigh the same but have different visible dimensions if one carries more of its weight in depth while another spreads more of its weight across the face-up area. That is why a diamond size chart should be described as approximate rather than exact.
For round brilliant diamonds, diameter refers to the distance across the diamond from one girdle edge to the opposite girdle edge through the centre. Actual round diamonds are not mathematically perfect circles. GIA therefore measures the minimum and maximum diameter and calculates an average girdle diameter. The carat-to-millimetre table is therefore a visual-sizing reference, while the individual diamond's actual measurements remain the better specification.
Finished Stud Size Is Larger Than Diamond Size
A second major source of confusion is treating the diamond diameter as the complete earring diameter. The setting adds metal around or beside the stone. A prong-set solitaire can remain relatively close to the diamond's outline. A bezel surrounds the perimeter with metal. A halo adds another complete ring of smaller diamonds. A cluster can extend well beyond any individual stone. So when a round diamond measures 5.1 mm, the completed earring may measure more than 5.1 mm.
| Measurement | What It Describes |
|---|---|
| Diamond diameter | Width of the stone itself |
| Setting width | Metal structure surrounding/holding the diamond |
| Finished stud diameter | Complete width of the wearable earring |
| Halo diameter | Centre + halo + setting |
| Cluster dimensions | Complete multi-stone composition |
GIA notes that prong settings expose more of the diamond surface and can therefore maximise the visible impression of the stone. A bezel surrounds more of the diamond's perimeter with metal — if comparing a bezel pair with a prong pair, do not rely only on carat weight. Compare the finished stud diameter.
Halo Studs Should Never Use the Solitaire Size Chart Alone
A halo design adds smaller diamonds around the centre stone. This can create a much larger face-up earring while keeping the centre diamond relatively modest. The halo pair can produce a larger complete outline even though its centre stones are smaller. That is why halo products need at least three distinct fields: centre-diamond size, pair TCW, and: finished stud diameter.
Cluster Earrings Need Finished Dimensions
A cluster uses several diamonds to create one larger form. There may be no single diamond whose diameter explains the appearance of the complete stud. In that case, a round-solitaire carat chart is not useful. The customer needs the complete: width and: height of the finished earring. If the cluster is circular, a finished diameter can also be useful.
Round Diamond Reference: What Different Sizes Mean Visually
The physical increase between common carat milestones is smaller than many buyers expect. For example, moving from approximately 0.50 ct / 5.1 mm to: 1.00 ct / 6.4 mm does not double the diameter. The diamond doubles in weight, but its diameter grows by roughly 1.3 mm in this approximate reference. That is because diamonds have three-dimensional volume.
| Per-Ear Carat Weight | Approx. Diameter | General Physical Character |
|---|---|---|
| 0.25 ct | ~4.1 mm | Compact |
| 0.50 ct | ~5.1 mm | Noticeable but relatively restrained |
| 0.75 ct | ~5.8 mm | Medium-strong presence |
| 1.00 ct | ~6.4 mm | Strong solitaire presence |
| 1.50 ct | ~7.4 mm | Large |
| 2.00 ct | ~8.1 mm | Very substantial |
The descriptive terms are relative rather than universal. How large the stud feels also depends on the wearer and setting.
Do Not Call One Carat Weight "The Perfect Size"
There is no universal ideal diamond earring size. Someone may prefer 0.25 ct per ear because they want discreet everyday studs. Another wearer may prefer 1.00 ct per ear because they want a clearly visible solitaire. Another may choose a halo around a smaller centre because they want greater finished diameter without concentrating all the diamond weight in the centre stones. Size is a visual and comfort choice. The strongest page should help the customer understand scale rather than tell everyone to buy the same carat.
Earlobe Size Changes How the Same Stud Appears
A 6.4 mm stud does not occupy the same percentage of every earlobe. On a smaller lobe, it can appear very prominent. On a larger lobe, the same stud can look comparatively restrained. Piercing position matters as well. A low piercing can leave less space beneath the stud. A higher piercing can position the same earring differently. This is why model photography can provide context but should not replace millimetre measurements.
First Piercing vs Second or Third Piercing
The available physical space becomes especially important with multiple piercings. A large primary stud may leave limited room for a second earring beside it. If the earring has a bezel or halo, its finished dimensions can be substantially larger than the centre diamond. For a multi-piercing stack, compare the finished earring dimensions rather than just the carat numbers.
Earring Backing Can Affect How Large Studs Sit
As diamond size and finished earring weight increase, backing support becomes more important. GIA notes that larger earrings can droop if their backs are too small to provide adequate support. This creates an important connection between size and fastening. A large stud should not be selected purely because the wearer likes the diameter. The post and backing also need to support the completed earring appropriately.
For the full setting/backing trade-off, continue with How to Choose Lab-Grown Diamond Stud Earrings
.jpg "Why This Round-Diamond Chart Should Not Be Used for Other Shapes")
A 1.00 ct oval reference is around 8 × 5.5 mm — completely different from the 6.4 mm round reference. Always use shape-specific measurements.
Why This Round-Diamond Chart Should Not Be Used for Other Shapes
A 1.00 ct round diamond and a 1.00 ct oval diamond do not have the same dimensions. They cannot. One is roughly circular. The other is elongated. Likewise, a pear, marquise, emerald, princess or cushion diamond distributes its weight differently. That means a single diameter chart makes sense for round diamonds only. Fancy shapes need at least two face-up dimensions.
| Shape | Useful Face-Up Measurement |
|---|---|
| Round | Diameter |
| Princess | Length × width |
| Oval | Length × width |
| Pear | Length × width |
| Marquise | Length × width |
| Emerald | Length × width |
| Radiant | Length × width |
| Cushion | Length × width |
| Heart | Width / length as reported |
Example: Round vs Oval at the Same Carat Weight
Blue Nile's current carat-size chart illustrates this clearly. Its approximate 1.00 ct round reference is about: 6.4 mm while the 1.00 ct oval reference is around: 8 × 5.5 mm. Both stones weigh one carat. Their face-up geometry is completely different. That is why carat should never be used as a universal physical-size unit.
Princess Cuts Also Need Their Own Reference
A princess cut is square rather than round. Blue Nile's chart gives an approximate 1.00 ct princess dimension around: 5.5 mm × 5.5 mm. Again, that is not interchangeable with the 6.4 mm round reference. The same principle applies to every other shape. Do not tell a customer that a 1 ct oval is "6.4 mm" because a 1 ct round reference uses that figure.
Shape Can Affect How Large Earrings Appear
An elongated shape can cover more vertical space even when its width remains modest. A pear or marquise stud may therefore appear larger in one direction than a round stud of the same weight. A princess cut can create a strong square outline but may measure less across than a round diamond of identical carat weight. This is why the correct question is not: What carat looks biggest? It is: What physical dimensions and outline do I want?
Setting Orientation Matters for Fancy Shapes
Oval, pear, marquise and rectangular diamonds can be mounted in different orientations. An oval stud may be vertical or horizontal. A pear may point up or down. An emerald-cut diamond may be positioned vertically or horizontally. The same diamond dimensions can therefore create different finished earring widths and heights. Use the complete setting dimensions where available.
How to Select Round Solitaire Stud Size
For round solitaire studs, start with per-ear diamond diameter. If you know the pair-total weight, divide the weight appropriately only if the listing confirms a simple, evenly matched two-stone pair. Then use the table as a broad reference. For example: 1.00 ct TW pair → approximately 0.50 ct each → approximately 5.1 mm round diamond each before setting. That gives you a much clearer idea of physical presence than the phrase "1 carat earrings" alone.
How to Select Bezel Stud Size
Use the centre diamond dimensions first. Then find the complete bezel diameter. If a product page gives only the diamond carat weight and no finished dimensions, you still do not know the true visible width. This becomes especially important when comparing bezels with prongs.
How to Select Halo Stud Size
For halos, prioritise three numbers: centre-diamond size, complete pair TCW, and: finished halo diameter. The finished diameter tells you how much earlobe area the complete earring occupies. This is often the measurement buyers actually care about.
How to Select Cluster Stud Size
For cluster earrings, start with the full finished width and height. TCW remains useful for understanding combined diamond weight. But it does not tell you the scale of the composition. Two cluster designs can contain the same TCW while using completely different shapes and spacing.
How to Select Drop-Earring Size
This page should only introduce the distinction. Drop earrings are primarily sized by: full drop length and: maximum width. The individual diamonds can then be described separately. A round-stud diameter chart should not be used to decide whether a drop earring is "small" or "large".
For the deeper process, use How to Choose Lab-Grown Diamond Drop Earrings
How to Select Hoop Size
Hoops use a different physical measurement again. Diameter describes the overall curve of the hoop. The diamonds set into the hoop can have their own individual dimensions. A 20 mm hoop and a 5 mm round solitaire stud cannot be compared as though both "20 mm" and "5 mm" describe the same type of measurement. This page should remain primarily a stud-size reference, while the earring comparison and buying guides handle earring-category selection.
Finished Earring Width Matters More Than TCW for Some Designs
Imagine two fictional pairs. Pair A uses 1.00 ct TW round solitaire studs. Pair B uses 1.00 ct TW halo studs. The solitaire pair might use approximately 0.50 ct centre diamonds per ear. The halo pair might use smaller centres plus accent diamonds. The halo could still be physically wider than the solitaire. The headline pair TCW would not reveal that.
| Specification | Pair A | Pair B |
|---|---|---|
| Pair TCW | 1.00 ct | 1.00 ct |
| Design | Solitaire | Halo |
| Centre diamond per ear | ~0.50 ct | Smaller than 0.50 ct |
| Approx. solitaire diamond diameter | ~5.1 mm | Depends on centre |
| Finished earring width | Close to diamond + setting | Potentially much larger |
| Main size metric | Diamond diameter | Finished halo diameter |
A Bigger Diamond Is Not Automatically More Comfortable
Larger studs usually contain more diamond mass. The setting may also become larger and heavier. That can increase how noticeable the earring feels on the lobe. Backing support then becomes more important. A buyer should therefore think about: diameter and: finished weight together.
Larger Studs Can Need More Rear Support
A large front element with a very small back can tilt forward. This is commonly described as drooping. The issue may be related to the earring size and backing rather than the lobe itself. If you are moving from very small studs to substantially larger diamonds, check the backing construction rather than assuming the same tiny back is appropriate.
Diamond Size vs Diamond Quality
Size is only one part of the purchase. A bigger diamond with poor visual performance is not automatically preferable to a slightly smaller diamond that you prefer. Likewise, a very high clarity grade does not make an uncomfortable finished stud the right choice. Choose physical scale first. Then select suitable diamond quality within that design and budget.
Pair Matching Becomes More Noticeable as Stud Size Increases
As solitaire diamonds become larger, differences in dimensions or overall appearance may become easier to notice. A matched stud pair should therefore look deliberately coordinated. That does not require mathematically identical measurements, but the visible scale should be close enough that one ear does not appear to carry a meaningfully larger diamond.
For the complete matching process, use How to Choose Lab-Grown Diamond Stud Earrings
Do Not Infer Millimetres From Carat Alone When the Actual Measurements Exist
If the individual diamond report states: 6.32–6.38 mm use those measurements. Do not replace them with: approximately 6.4 mm because it is one carat. The chart exists to provide an approximate reference where you need to visualise a carat category. The actual diamond measurements are more precise.
GIA Reports Round Diameter More Precisely
For a round brilliant, GIA records minimum and maximum diameter measurements and calculates an average girdle diameter. This reinforces why a web article should avoid presenting one diameter as an exact universal dimension for every carat weight. The table is educational. The diamond's report is specific.
Lab-Grown and Natural Diamonds Use the Same Carat Unit
A one-carat lab-grown diamond weighs the same as a one-carat natural diamond: 0.2 grams. Carat is a standard unit of weight. The sizing logic on this page therefore applies to round diamonds based on weight and proportions rather than whether the diamond was grown in a laboratory or formed naturally. The origin remains a separate product-disclosure issue.
Does Lab-Grown Origin Change Diameter?
Not because of the origin itself. A well-proportioned 1 ct round lab-grown diamond and a similarly proportioned 1 ct round natural diamond can have comparable physical dimensions. Variation comes from how the individual diamond was cut, not from the fact that one was laboratory-grown.
Diamond Documentation Does Not State Finished Earring Size
A diamond report can provide individual stone dimensions. It does not automatically give you the width of the finished earring after the stone is set. That value must come from the jewellery product specification. This is particularly important for bezels, halos and clusters.
Model Images Are Useful but Not a Ruler
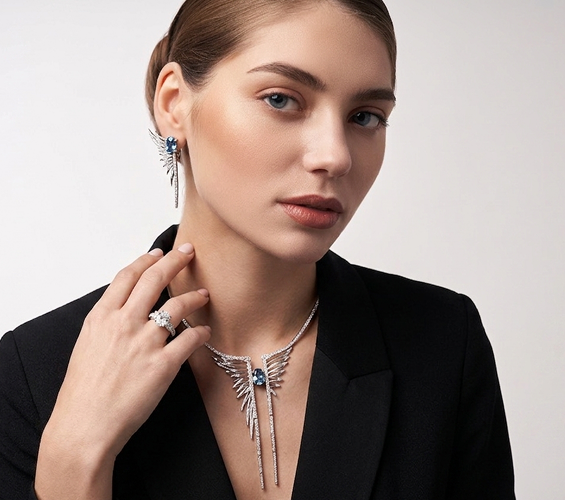
A model photograph helps answer: Does this size look subtle or prominent in context? It cannot answer: Exactly how many millimetres wide is this stud? The wearer's earlobe dimensions are unknown. Camera distance and image scaling can also change perception. Use model imagery for context and product measurements for size.
.jpg "How to Compare Two Stud Sizes Properly")
Normalise the full specification before comparing — headline TCW alone will not reveal the true physical presence difference.
How to Compare Two Stud Sizes Properly
Do not compare only TCW. Normalise the physical specifications — design, pair TCW, per-ear centre weight, diamond dimensions, finished stud dimensions, setting, finished weight per earring, backing, diamond shape, and whether the image is exact or representative. Only after those values are understood should you decide which pair gives the physical presence you prefer.
Round Stud Example: 1 ct TW vs 2 ct TW
Consider two simple fictional round solitaire pairs. Pair A is 1.00 ct TW, or approximately 0.50 ct per ear. A typical 0.50 ct round diamond is around 5.1 mm. Pair B is 2.00 ct TW, or approximately 1.00 ct per ear. A typical 1.00 ct round is around 6.4 mm. The pair total doubles from one carat to two carats. The approximate diameter per diamond grows from about 5.1 mm to about 6.4 mm. That is a much more realistic way to understand the physical difference.
Round Stud Example: 2 ct TW vs 4 ct TW
A simple 2.00 ct TW round solitaire pair uses roughly 1.00 ct per ear, or about 6.4 mm each in the approximate reference. A 4.00 ct TW pair uses roughly 2.00 ct per ear, with round diamonds around 8.1 mm each in the same approximate reference. Again, doubling pair weight does not double diameter.
Choosing Earrings for Everyday Wear
There is no carat threshold that automatically makes an earring "everyday". A wearer may comfortably use 1 ct per ear every day. Another may prefer 0.25 ct per ear. Physical presence, backing, finished weight and personal style matter more than an arbitrary label. Choose the size you will realistically wear.
Choosing Earrings as a Gift
Stud size can be difficult to estimate for another person. Look at earrings the recipient already wears. If possible, estimate or measure their finished diameter. That is much more useful than assuming a particular carat total is universally suitable as a gift.
For the complete gift process, use How to Choose Lab-Grown Diamond Earrings as a Gift
How Aurelia Product Pages Should Show Diamond Earring Size
Aurelia should not rely on one field labelled simply: Carat: 1.00 ct for stud products. A stronger format is:
| Specification | Example Structure |
|---|---|
| Pair total diamond weight | Confirmed value |
| Main diamond weight per earring | Confirmed value |
| Main diamond dimensions | Confirmed mm measurements |
| Finished stud diameter/width | Confirmed product measurement |
| Setting | Prong / bezel / halo / other confirmed type |
| Finished weight per earring | Where confirmed/useful |
| Backing | Exact confirmed backing type |
This would remove a major source of uncertainty from the product journey. If Aurelia later wants size charts for oval, pear, princess or other studs, create separate shape-specific references using the appropriate measurement (length × width rather than diameter) for each shape. Do not place them into one column labelled "diameter". That would create false precision.
.jpg "Frequently Asked Questions")
The best earring size is not automatically the highest carat weight — it is the combination of per-ear diamond size, finished setting size, wearer proportions and comfort.
Frequently Asked Questions
What does 1 ct diamond stud earrings mean?▼
It can be ambiguous. For a pair, it often means 1.00 ct total across both earrings, or approximately 0.50 ct per ear in a simple two-stone pair. The product page should state the scope explicitly.
How big is a 0.50 ct round diamond?▼
A typical 0.50 ct round diamond is approximately 5.1 mm in diameter, although actual measurements vary with proportions.
How big is a 1 ct round diamond?▼
A typical 1.00 ct round diamond is approximately 6.4 mm across.
How big is a 2 ct round diamond?▼
A typical 2.00 ct round diamond is approximately 8.1 mm across.
Is diamond carat the same as millimetres?▼
No. Carat measures weight; millimetres measure physical dimensions.
Is finished stud size the same as diamond diameter?▼
No. The setting can add additional width around the diamond.
Does a bezel stud look bigger than a prong stud?▼
It can have a larger finished outline because metal surrounds the diamond. Compare the actual finished diameter rather than assuming.
Does a halo make diamond studs look larger?▼
A halo usually increases the complete face-up outline by surrounding the centre with additional stones.
Can I use a round-diamond size chart for oval studs?▼
No. Oval diamonds need length and width measurements rather than a single round-diamond diameter.
Why can two diamonds with the same carat have different diameters?▼
Different proportions and depths distribute the same weight differently.
Does a larger diamond need a larger earring back?▼
Larger or heavier studs may require greater backing support to prevent drooping. The actual backing should suit the finished earring.
What is the best size for diamond studs?▼
There is no universal best size. Choose the physical diameter and finished earring scale that suit the wearer and intended use.
Final Answer: How Should You Choose Diamond Earring Size?
Start with the earring design. For simple round solitaire studs, determine the pair-total carat weight and then identify the approximate per-ear diamond weight. Use the round reference as a visual guide: 0.50 ct TW pair → ~0.25 ct each → ~4.1 mm round diamond; 1.00 ct TW pair → ~0.50 ct each → ~5.1 mm; 1.50 ct TW pair → ~0.75 ct each → ~5.8 mm; 2.00 ct TW pair → ~1.00 ct each → ~6.4 mm; 3.00 ct TW pair → ~1.50 ct each → ~7.4 mm; 4.00 ct TW pair → ~2.00 ct each → ~8.1 mm.
Then check the actual diamond measurements where available. After that, check the finished setting dimensions because prongs, bezels, halos and clusters change the complete earring size. Do not apply the round chart to other shapes. Oval, pear, princess, emerald, radiant and other diamonds need shape-specific length-and-width measurements. Finally, consider comfort, backing support and how much physical presence you want on the ear. The best earring size is not automatically the highest carat weight. It is the combination of: per-ear diamond size + finished setting size + wearer proportions + comfort that creates the appearance you actually want.
For the complete stud selection process, continue with How to Choose Lab-Grown Diamond Stud Earrings
For overall earring selection, use How to Choose Lab-Grown Diamond Earrings
For stud-vs-hoop-vs-drop comparisons, use How to Compare Different Diamond Earring Designs
For drop-specific sizing and movement, use How to Choose Lab-Grown Diamond Drop Earrings
Explore Aurelia Royale Lab-Grown Diamond Earrings
Per-ear diamond size + finished setting dimensions + comfort — find the right scale.
Stay Connected
Get Our Latest Updates
Be first to discover new collections, exclusive events, and the quiet privileges reserved for our inner circle.